
Sep 21, 2026
How to Add a Multiple Rotating Announcement Bar in Shopify
The Multiple Rotating Announcement Bar lets you highlight multiple promotions or announcements in a single banner. For example, you can display messages like “Free shipping above $50” and “20% off on all T-shirts”, which automatically rotate to keep your customers informed about different offers.
The banner can have multiple slides, automatically switching from one announcement to the next after a selected duration.
In this article, we’ll learn how to create a Multiple Rotating Announcement Bar with three announcements: “10% off on all Products” with an Apply Discount button, “Free shipping above $50”, and “Buy any 2 items and Get 20% Off” with a View More button. Each announcement will rotate automatically within the same banner.

Step 1: installing shopify App for Rotating Announcement bar
Announcement bar provided by most Shopify themes allow only single announcement and with limited customization.
Hence to create multiple rotating announcement banner we will install a third party app from shopify app store.
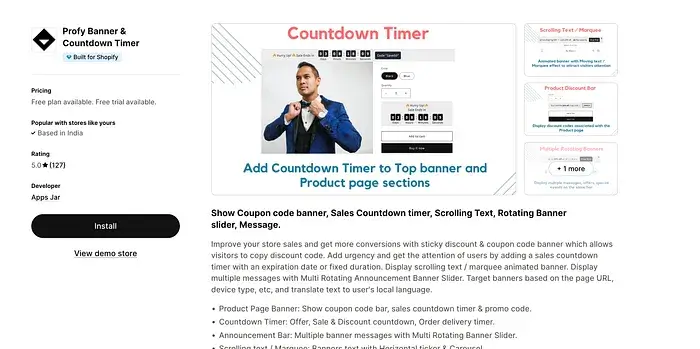
We will install the Profy Banner & Countdown Timer shopify app, which along with rotating announcement bar has all other annoucement bar options such as scrolling text, coupon bar, countdown timer etc. If u might need in future.
Link: https://apps.shopify.com/profy-promo-bar
Step 2: Click on create new banner button
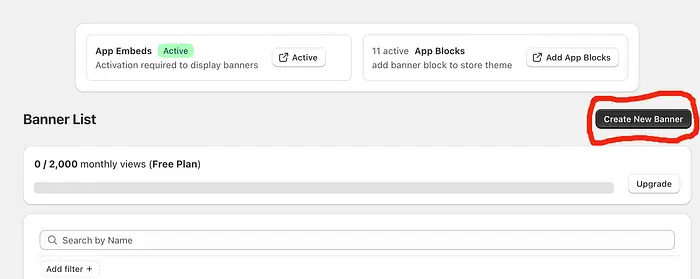
Go to the app’s home page and click Create New Banner.
Step 3: Selecting “Announcement bar -> Multiple Rotating Banners”
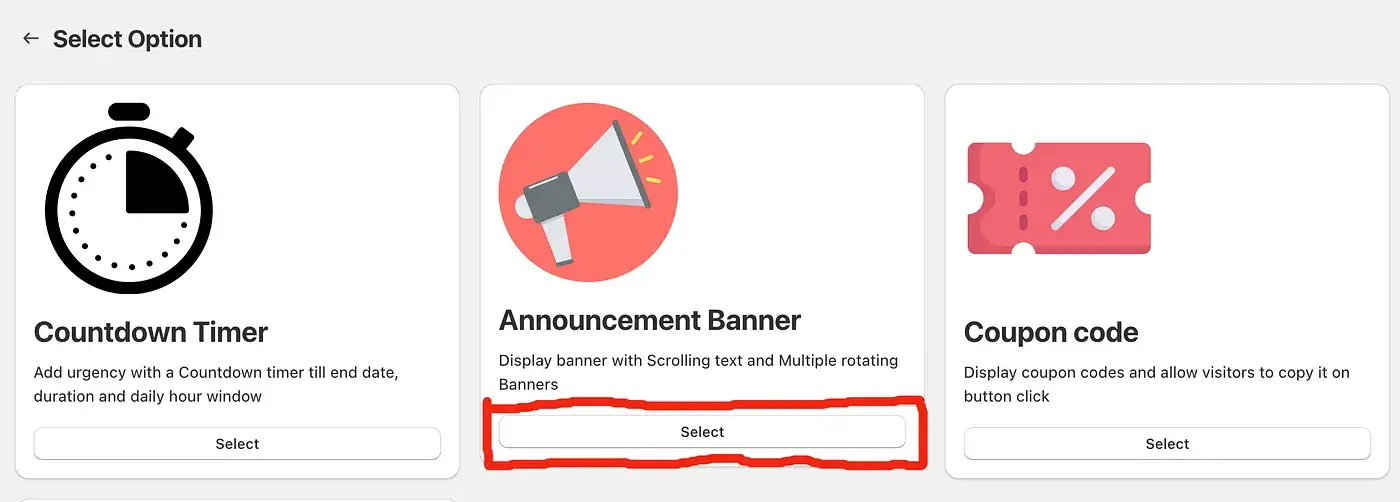
To create a rotating banner, first select “Top / Bottom Bar” as the placement. In the second step, choose “Announcement Banner” as the banner type.
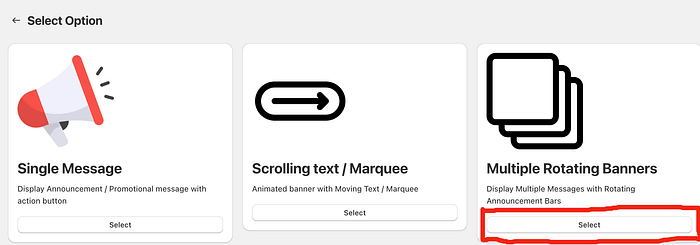
Finally, select “Multiple Rotating Banner” to create a banner that displays multiple announcements and automatically switches between them.
Step 4: Add details for first announcement message
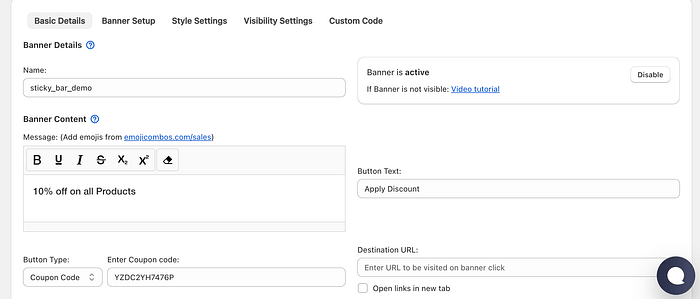
In the Banner Details tab, add the content that will be displayed on the first slide. Enter “Free shipping above $50” as the banner message and “Apply Discount” as the button text.
Set the button type to Coupon Code and enter the correct coupon code so that the discount is automatically applied to the cart when customers click the button.
Step 5: Add second slide for second announcement message
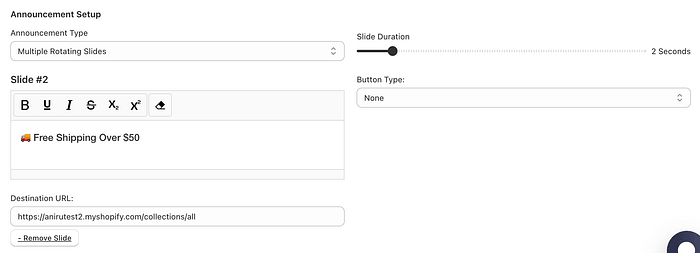
To add the second slide, navigate to the “Banner Setup” tab and make sure “Multiple Rotating Slider” is selected under Announcement Setup.
Use the “Slide Duration” option to control how many seconds each slide remains visible before automatically switching to the next announcement.
In the “Slide #2” section, enter “Free Shipping Over $50” as the announcement message. Since this announcement does not require a button, set the Button Type to None and leave the Destination URL field empty.
Step 6: Add third announcement message
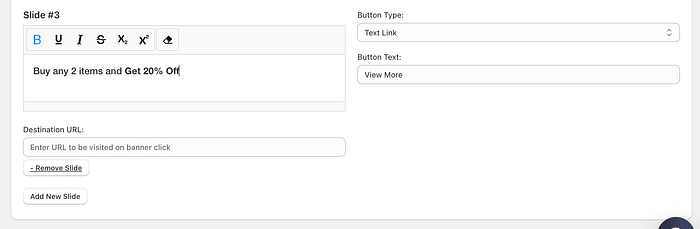
Click “Add New Slide” to add the third announcement to the banner. Enter “Buy any 2 items and Get 20% Off” as the banner message, select “Text Link” as the button type, and set the button text to “View More”.
Finally, enter the URL of the collection associated with the discount in the Destination URL field so customers can view the eligible products.
Step 7: Design Announcement bar to match your Store theme
Next, customize the appearance of the announcement bar by selecting the background color, text color, button background color, and button text color.
You can further personalize the banner using font options or a background image. Alternatively, choose a Banner Template to automatically apply a predefined combination of colors and styling.

Step 8: Add the Banner to Your Store
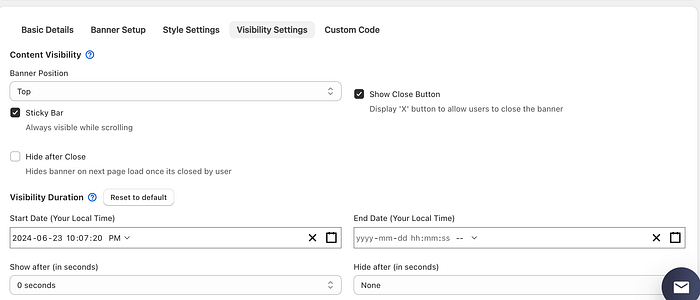
Select “Top” as the banner placement, which is the default option. You can enable or disable the Sticky Bar based on your requirements.
If the announcement is for a limited-time sale or promotion, you can also set a Start Date and End Date. The announcement will then be displayed only during the specified period.
Final Result
Click the “Save” button to save your settings. The Multiple Rotating Announcement Bar will then be added to your Shopify store and displayed according to the configuration you selected.
The final result will be a Multiple Rotating Announcement Bar displaying three different announcements, with each message automatically switching to the next after the selected slide duration.